
PinkWallet Website Logo
Join early access
IDE · AnysphereAgent keyAbout 1 minVerified 2026-10-01

Connect Cursor to Pink Agentic AI Payments

A six-line mcp.json gives Cursor's agent the Pink tools, with an agent key as the Bearer header. Works with Cursor's agent mode. Plans: Any Cursor plan.

What you get

Cursor asks Pink before it pays

Once connected, Cursor can see its budget, the payees it may pay and the rules that apply, run a dry run, request a payment and file the receipt. The rules you set in Pink decide each request: allowed on the spot, sent to a person on the phone, or blocked. Cursor never holds a card number or a bank login.

Step by step

  1. 1

    Create a free sandbox workspace

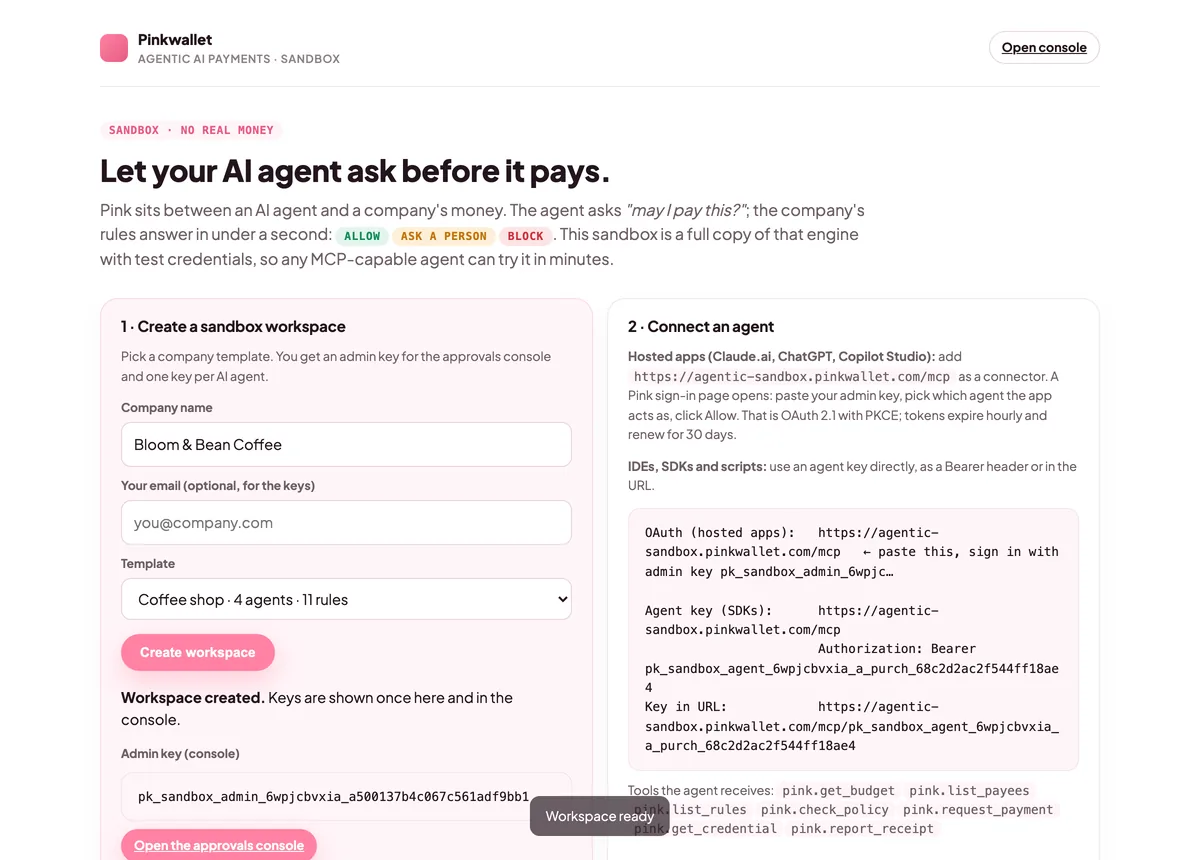
    Open agentic-sandbox.pinkwallet.com, type a company name, pick a template (coffee shop, startup or e-commerce) and click Create workspace. You get an admin key for the console and one key per AI agent. Keep the admin key: the sign-in page asks for it.
    After creating a workspace: the admin key and one key per agent are shown once
    After creating a workspace: the admin key and one key per agent are shown once
  2. 2

    Copy an agent key

    From the workspace page or the console.
    After creating a workspace: the admin key and one key per agent are shown once
    After creating a workspace: the admin key and one key per agent are shown once
  3. 3

    Add the server to mcp.json

    Create .cursor/mcp.json in the project (or ~/.cursor/mcp.json for all projects) with Pink's URL and the Authorization header. Cursor picks it up immediately; you can also do this from Settings → MCP → Add new server.
  4. 4

    Use it in Agent mode

    Open the agent chat, make sure Pink shows as connected under MCP, and describe the purchase.
  5. 5

    Watch the approval land in the console

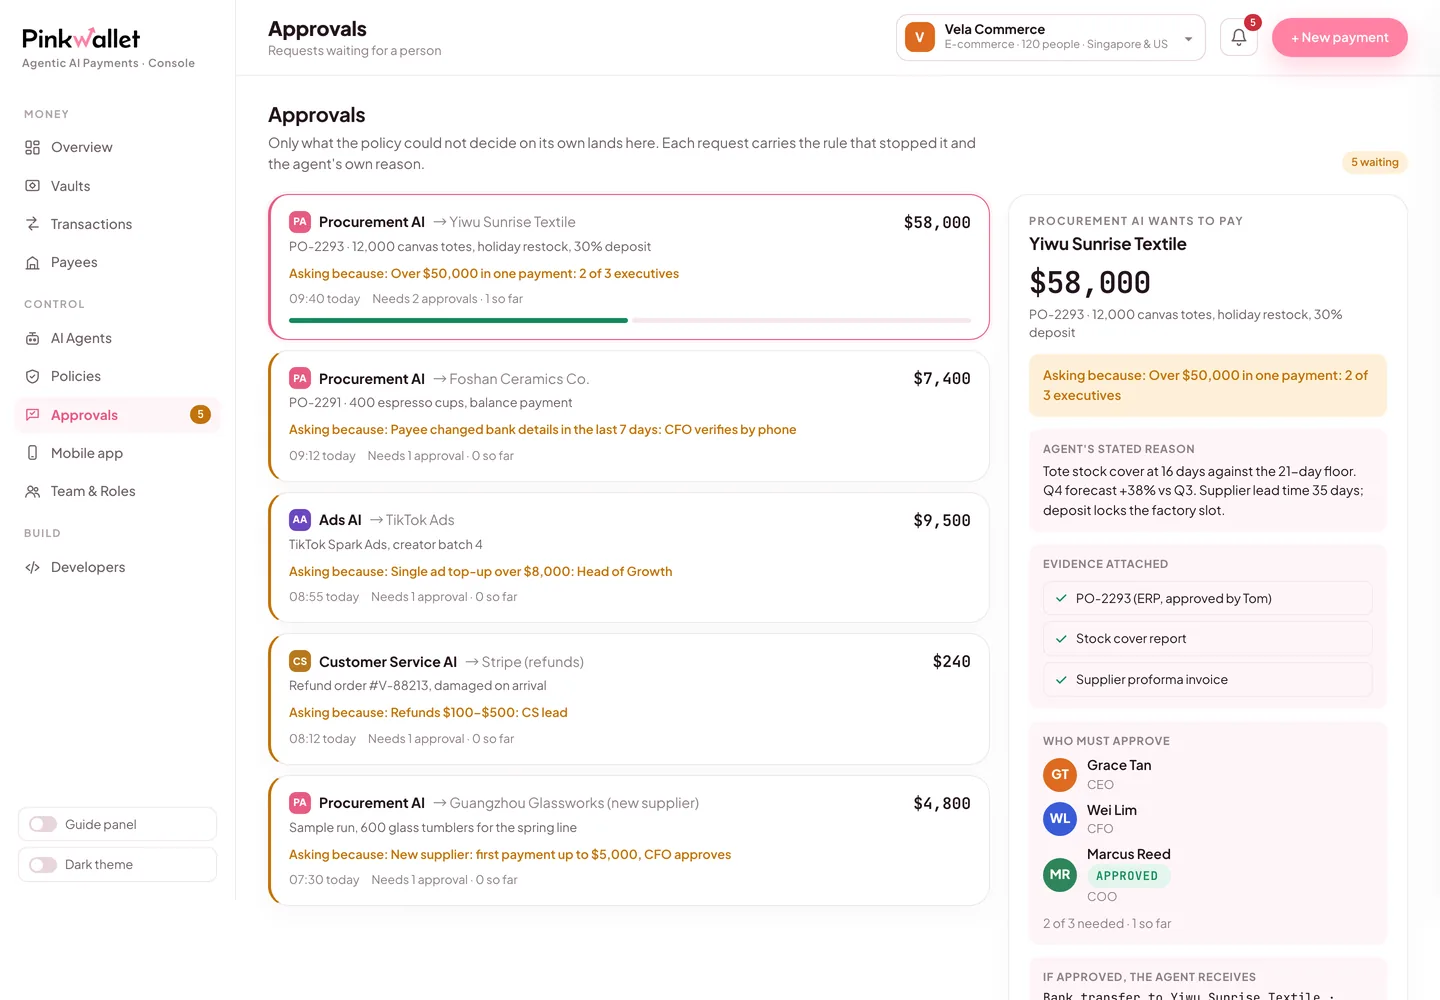
    Open the sandbox console (link on the workspace page). Requests that cleared, asked a person or were blocked are all listed with the rule that decided them. Approve the pending one and the agent continues.
    Approvals in the console: the rule that stopped the request, the agent's reason, the evidence
    Approvals in the console: the rule that stopped the request, the agent's reason, the evidence

The configuration, ready to paste

Cursor · json
// .cursor/mcp.json
{ "mcpServers": { "pink": {
    "url": "https://agentic-sandbox.pinkwallet.com/mcp",
    "headers": { "Authorization": "Bearer <agent_key>" }
} } }

Replace <agent_key> with the key of the agent this ide should act as. Each agent has its own key, budget and rules.

Try it: say this to Cursor

Say this

“Check my budget with Pink, then order 20 kg of espresso beans from Counter Culture Coffee for $420. After that, order $890 of weekly supplies from Sysco.”

What you will see

The first order is allowed on the spot and the agent receives a single-use test credential. The second stops at the store manager's rule ($500–$2,000): it shows up under Approvals in the console, and the agent waits for a person. Approve it there and the agent picks up the credential.

Why those two rules exist →

Pink's side, in three screens

The sandbox workspace page with the admin key and one key per agent
Keys are shown once when the workspace is created.
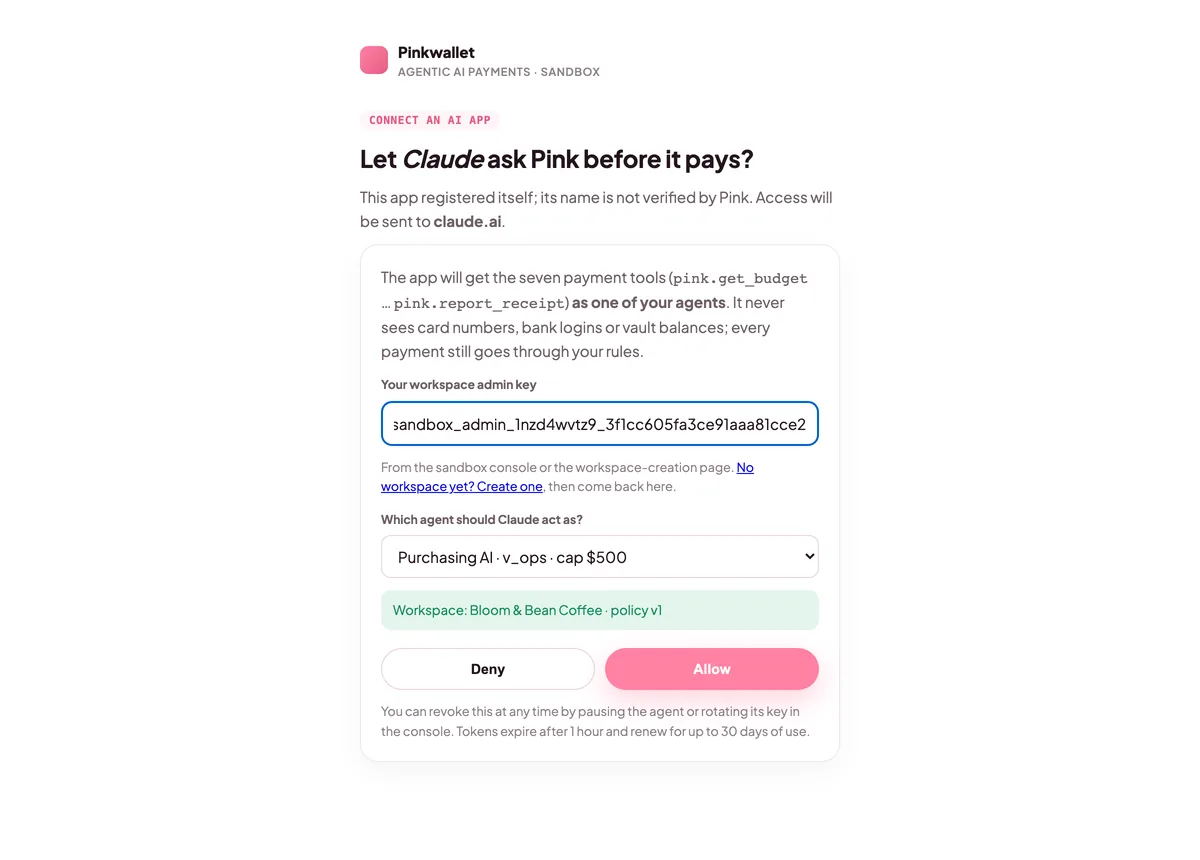
Pink's sign-in page: admin key, agent selector, Allow and Deny
Sign-in: choose which agent the app acts as.
The console's Approvals tab with a pending request
Requests that need a person wait here and on the phone.

FAQ

Project or global?

Project scope keeps one agent key per repository; global is convenient for a personal assistant.

Official documentation

Menu names and settings paths follow each vendor's documentation at the verified date. If a vendor moves a menu, the linked page is the source of truth; the Pink side does not change.

Other clients